As important as it is, cybersecurity is still constrained by budget.
Thankfully there are some fantastic free tools that you can add to your cybersecurity arsenal to help you protect your network.
Free and Open Source
Free software? Sounds great, but can you trust it?
If it’s open source, yes, you can. Open source is a way of developing software that provides transparency to the end-users. They can obtain the source code that makes up the application and review it. They can verify for themselves that it isn’t doing anything sinister or sneaky with their data.
As well as reviewing the source code, users can modify that source code – if they are a programmer – to fix bugs or to add new features. The changes are submitted to the maintainers of the product. If the maintainers like the changes, they will find their way into the product.
This benefits both the users of the open-source application – known as the community – and the developers of the products. The more eyes that review the code, the better.
As Linus Torvalds, chief maintainer of the Linux kernel, famously said, “…given enough eyeballs, all bugs are shallow.”
Though Open Source isn’t Foolproof
That doesn’t mean open-source software can’t have bugs. All large software projects will contain bugs. But what it does mean is that when bugs are discovered, they are characterized quickly and addressed rapidly, and the fixes are soon available as patches.
If you need the fixes straight away because they are critical to you, you can download the source code as soon as the bug fixes have been added. You can then compile the code and build a version for yourself with the fix in it so that you don’t need to wait for the official release to be rolled out.
All of the applications we’re going to look at in this article are open source. Some of them are the de facto standards in their fields. This stands as a testament to the dedication of the communities, maintainers, and project leaders behind these applications. There are many more open-source tools you can use to boost your cybersecurity posture and assist in the management and hardening of your network.
These are just the five that I find myself turning to again and again.
Nmap: Network Mapping Tool
Knowing what is connected to your network is a fundamental requirement to planning your patching and upgrading schedule, knowing what you’ve got to protect, and knowing which devices might be putting you at risk.
The nmap network mapper is a powerful scanning and reporting tool. It detects what devices are connected to your network and then scans those devices for information such as operating system type and version, open ports, IP address, and more. It will also detect and report on devices that are connected via Wi-Fi.
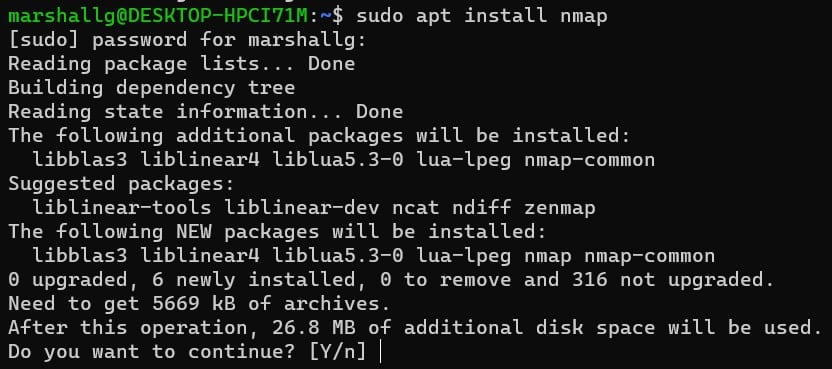
It is a cross-platform application with versions available for Linux, Windows, and Mac computers. Installing it is easy. This one-liner will install it on Ubuntu:
Once you’ve got it installed, use the -h (help) command line option to see the help summary or use man nmap to read the manual page. The options we’re using in this example are:
- -T4: Thorough (aggressive) scanning
- -A: For OS and version detection, script scanning, and traceroute information
- -v: Verbose output
Because nmap generates a lot of output, you’ll find it convenient to redirect the output into a file that you can review when the scan has finished.
This command tells nmap to scan an entire network. It’s using the classless inter-domain routing notation (CIDR). The “/24” represents the subnet mask. It indicates how many leading contiguous bits are set to one in the subnet mask. The value of 24 means 3 sets of 8 bits. 8 bits all set to 1 represents 255 in binary, so this subnet mask is 255.255.255.0.

You can review the scan results using the less command:

Scroll through the scan results looking at the details that have been uncovered for each device. Here’s what nmap had to say about the device with IP address 192.168.1.15. Four open ports have been detected.
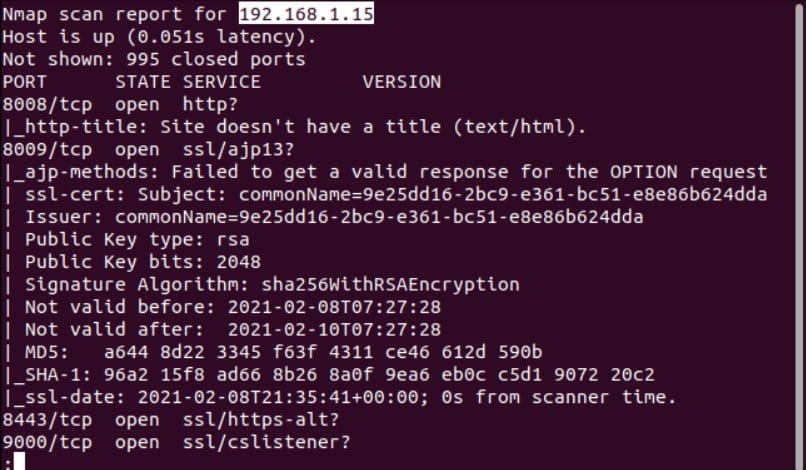
If the purpose of the port can be determined, you’re told what it’s being used for. If nmap cannot be certain, it suggests a possible use for the port. Anything inexplicable or suspicious will warrant a deeper investigation.
You could consider using the -T5 (most thorough) scan directly on that single IP address. The more thorough the scans, the longer they take. The nmap documentation calls -T5 the insane mode, so expect a long wait.
Wireshark: Packet Capture and Analysis
The nmap tool quickly tells you what is connected to your network and gives you as much information about each device as it can. But to see what network traffic is moving around your network and between your devices, you need a packet capture and analysis tool, commonly known as packet sniffer. Wireshark does just that.
Wireshark is cross-platform and available for Windows, Linux, and Mac computers. To install Wireshark on Ubuntu, use this command:

You’ll be asked if you want to have packet capture enabled for normal, non-root users. If you set it so that you need to be root to run Wireshark, you’re running the Wireshark codebase with elevated privileges. If you choose to allow non-root users to be able to use Wireshark, they may capture some network traffic that you’d prefer to be private. I generally install it so that you need to be root to capture network traffic.
When you see the following screen, press “Tab” to highlight the “button” and press the space bar. Select your desired choice.

When the installation has been completed, you can start Wireshark with this command:

The available network interfaces that you can capture traffic on are listed. Double-click on an interface to start capturing packets.
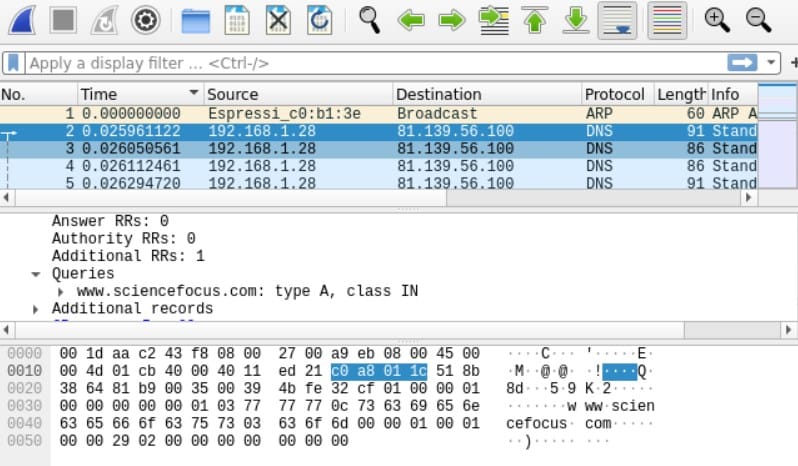
Wireshark will begin capturing network traffic on the selected network interface. The display changes to show three panes. The traffic is shown in the top pane.
To see the details of a packet, highlight it in the top pane. Low-level information about the packet is displayed in the middle pane and bottom panes. The middle pane has a collapsible tree view of human-readable values. The bottom pane shows the raw data of the packet in hexadecimal and ASCII.
This looks cramped in the screenshot, but when it is stretched out over an entire monitor, it is an information-rich, intuitive view.
Much of the power of Wireshark lies in its filtering functionality. You can create filters to limit what is captured and to filter what is displayed. It is usually better to capture everything – with no filter – and filter the displayed information during the analysis phase. If you filter during the capture phase, you might inadvertently filter out a packet or sequence of packets that really should have been captured.
Here are some example filters.
To select packets with 192.168.1.15 as either their source or destination address:
To select packets with 192.168.1.15 as their source IP address:
To select packets packet with 192.168.1.15 as their destination IP address.
To select the packets in a conversation between two IP addresses:
To display all HTTP and DNS packets:
To select TCP packets with 4000 as either their source or destination port:
To display all HTTP GET requests:
To find all TCP packets containing the word techopedia:
Osquery: Discover the State of Computers and Servers
The osquery application lets you ask questions about the state of your computers and servers using simple SQL statements. It is available for Windows, Linux, and Mac computers.
To install it on Ubuntu, browse to the osquery download page and download the “.deb” package file. Change into the directory of the downloaded file and install osquery with these commands. Substitute the name of your downloaded file for the one used in the example.

Start osquery in interactive mode with this command (note the “i” at the end of osqueryi.)
The osquery interactive shell opens. You type SQL commands at the “osquery” prompt and end them with a semicolon (;), and press “Enter” to have them executed.
Commands that you want to send to the shell, such as “quit,” are preceded by a period “.” and are called dot commands. So the command to exit the shell is “.quit” followed by “Enter.” Just remember that SQL commands require their usual final semicolon, dot commands do not.
To see the list of tables, use the .tables command, and to see the fields in a table, use the .schema command.
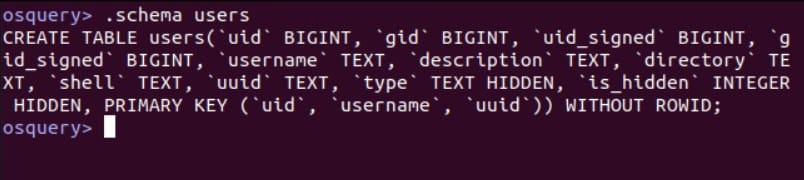
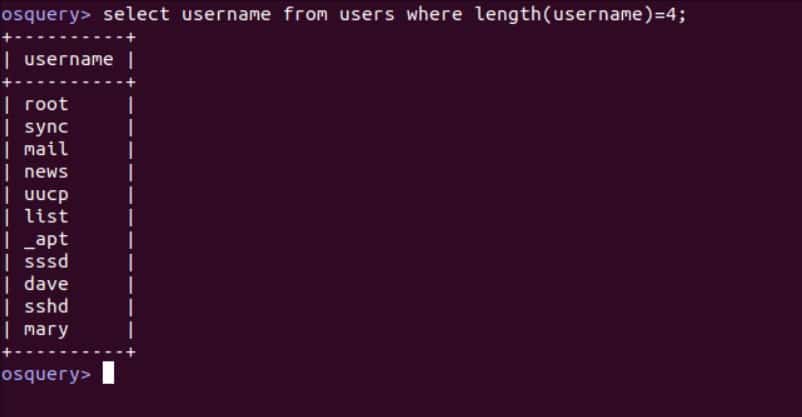
Now that you know the names of the fields in the table, we can create a SQL statement and run it:
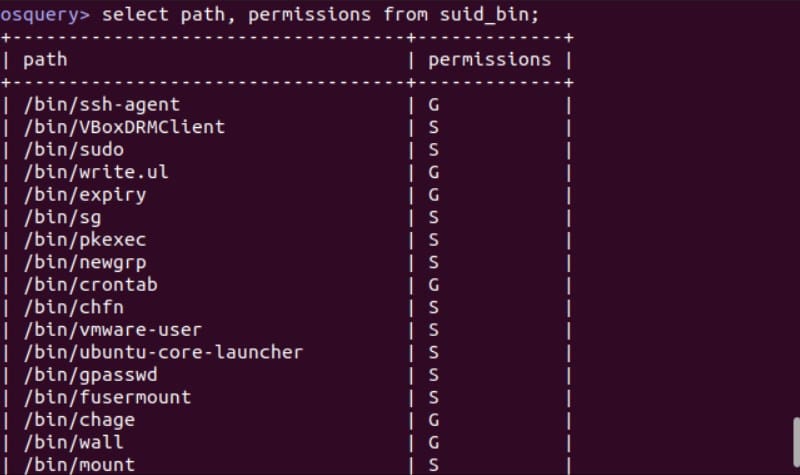
As an example of a security-related query, the suid_bin table holds details of the applications that have either or both of the SUID and GUID bits set. These allow normal users to run applications that have elevated privileges.
Threat actors sometimes exploit this and use it to escalate the privileges of malware and to hide backdoors. Keeping the SUID and GUID-empowered binaries under observation is good practice.
Nikto: Web Site Vulnerability Scanner
Let’s not forget the corporate websites and portals. Nikto will scan these for many types of vulnerability. The authors say that it will:
- Check for 6700 potentially dangerous files or programs.
- Check for outdated versions of over 1250 servers.
- Check for version-specific issues on over 270 servers.
Installing nikto is easy. On Ubuntu, use this command:

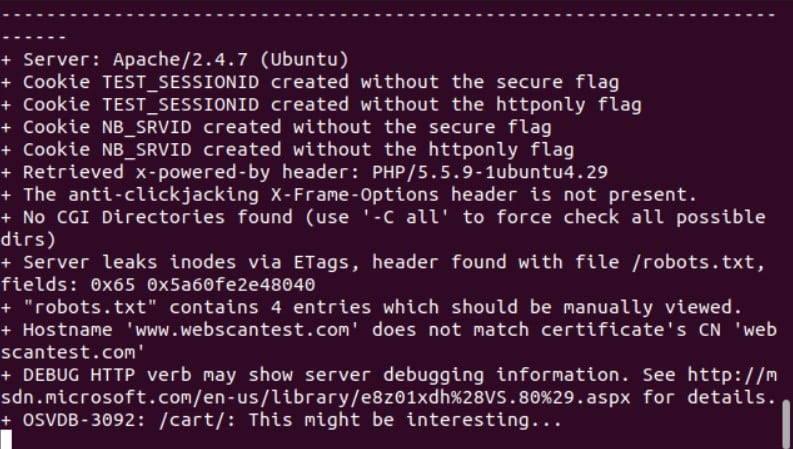
We’ll run nikto against a test website that was designed with built-in vulnerabilities so that you can practice scanning. Note that a nikto scan can take a little while—40 or more minutes isn’t uncommon—it is a very thorough process.
We tell nikto which webserver to scan by using the -h (host) option. We’ll also use the -o (output) option to specify a filename for our report. Nikto will work out from the filename extension what format we want the report created in. The recognized formats are CSV, HTML, TXT, and XML.

Although we’ve asked for a report to be created, we still get output sent to the terminal window as the scan progresses. This verifies the process is ongoing and hasn’t completely stalled.
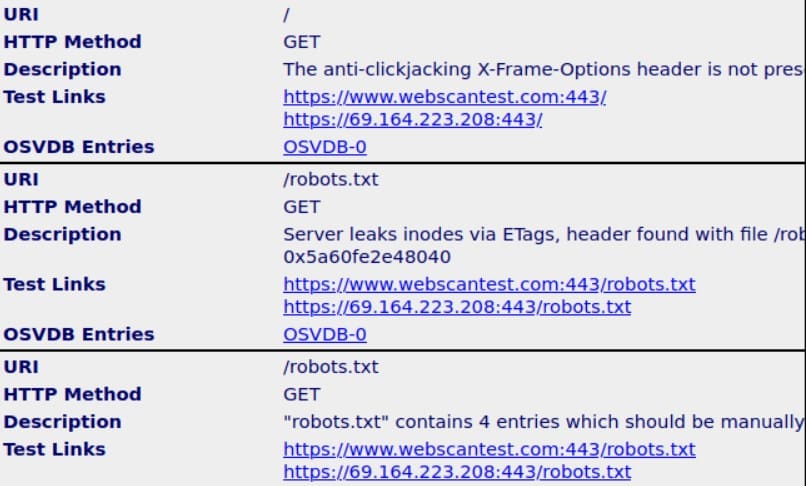
When the scan is finished, browse to the location where the report has been saved and double-click on the “report.html” file. The report will open in your browser.
Kali Linux: Everything, Including the Kitchen Sink
If you want to go all-in on tools to test your security, give Kali Linux a spin. It is a Linux distribution designed from the ground up for penetration testing. It contains numerous tools that allow you to probe your defenses in exactly the same way as the threat actors do.
Unfortunately, these tools can be used for good and for bad, so they’re a favorite with the bad guys too. Still, that’s all the more reason to become familiar with them yourself – or someone within our organization – so that you can identify vulnerabilities in your network and website and plug them in.
The easiest way to use Kali Linux is to download an ISO and install it as a virtual machine in a hypervisor such as VirtualBox.
Wireshark, Nikto, and nmap are pre-loaded along with almost any other reconnaissance, attack, and exploit tools that you can think of. All the hassle of identifying which tools to collect and add to your arsenal and then tracking them down and installing them is done for you.
Some notable tools and frameworks that are included in Kali Linux are:
- The Metasploit Framework: A suite of tools to identify and exploit vulnerabilities. Based on a database of over 140,000 common vulnerabilities and over 3,000 exploits (CVEs). This is a free and open-source offering from Rapid7, which also has commercial offerings with professional support.
- Burp Suite: A penetration testing tool designed for web-based applications and general website security issues. This, too, is the open-source version of a commercial product.
- The Social Engineering Toolkit: A suite of tools to allow you to perform social engineering attacks such as phishing and spear-phishing attacks. This is provided to perform susceptibility testing against your own staff, but you can see the double-edged sword of such software being so easy to acquire.
Kali is a Debian-based distribution. By default, it uses the XFCE desktop environment. Even in a virtual machine, you should find it responsive, snappy, and well-laid out.
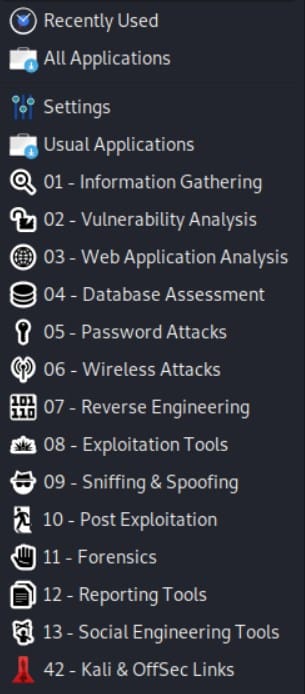
The main system menu gives you the top-tier categories of software and tools that you can drill down into.
Kali is a Debian-based distribution. By default, it uses the XFCE desktop environment. Even in a virtual machine, you should find it responsive, snappy, and well-laid out.